The best background support for a pack-away tabletop setup is the one that fits the place where you can actually work. A wide crossbar is not much help if its legs occupy the doorway, and a tiny stand is not a bargain if the background disappears behind every slightly taller product.
This shortlist compares two different arrangements: a small JEBUTU tabletop kit and a NEEWER floor-standing T-shaped support used behind a table. The choice is about working space and packing routine, not a claim that either has won a stability or durability test.
Start with the background you need to support
Measure the scene you want to photograph before comparing stands. Include the actual product width, some composition margin, and the background area that must remain visible when you turn the item for its second or third view.
For a small jar photographed straight on, that scene may fit comfortably inside a modest tabletop background. A tall vase or a group of items can change the requirement, especially if you want the background to curve onto the table rather than stop behind the product.

Also decide where the support will stand and where your hands, camera, and light need to go. Sketching those positions on a sheet of paper can reveal that the background’s nominal width is not the space problem you actually need to solve.
JEBUTU small T-shape kit: for small scenes on the table
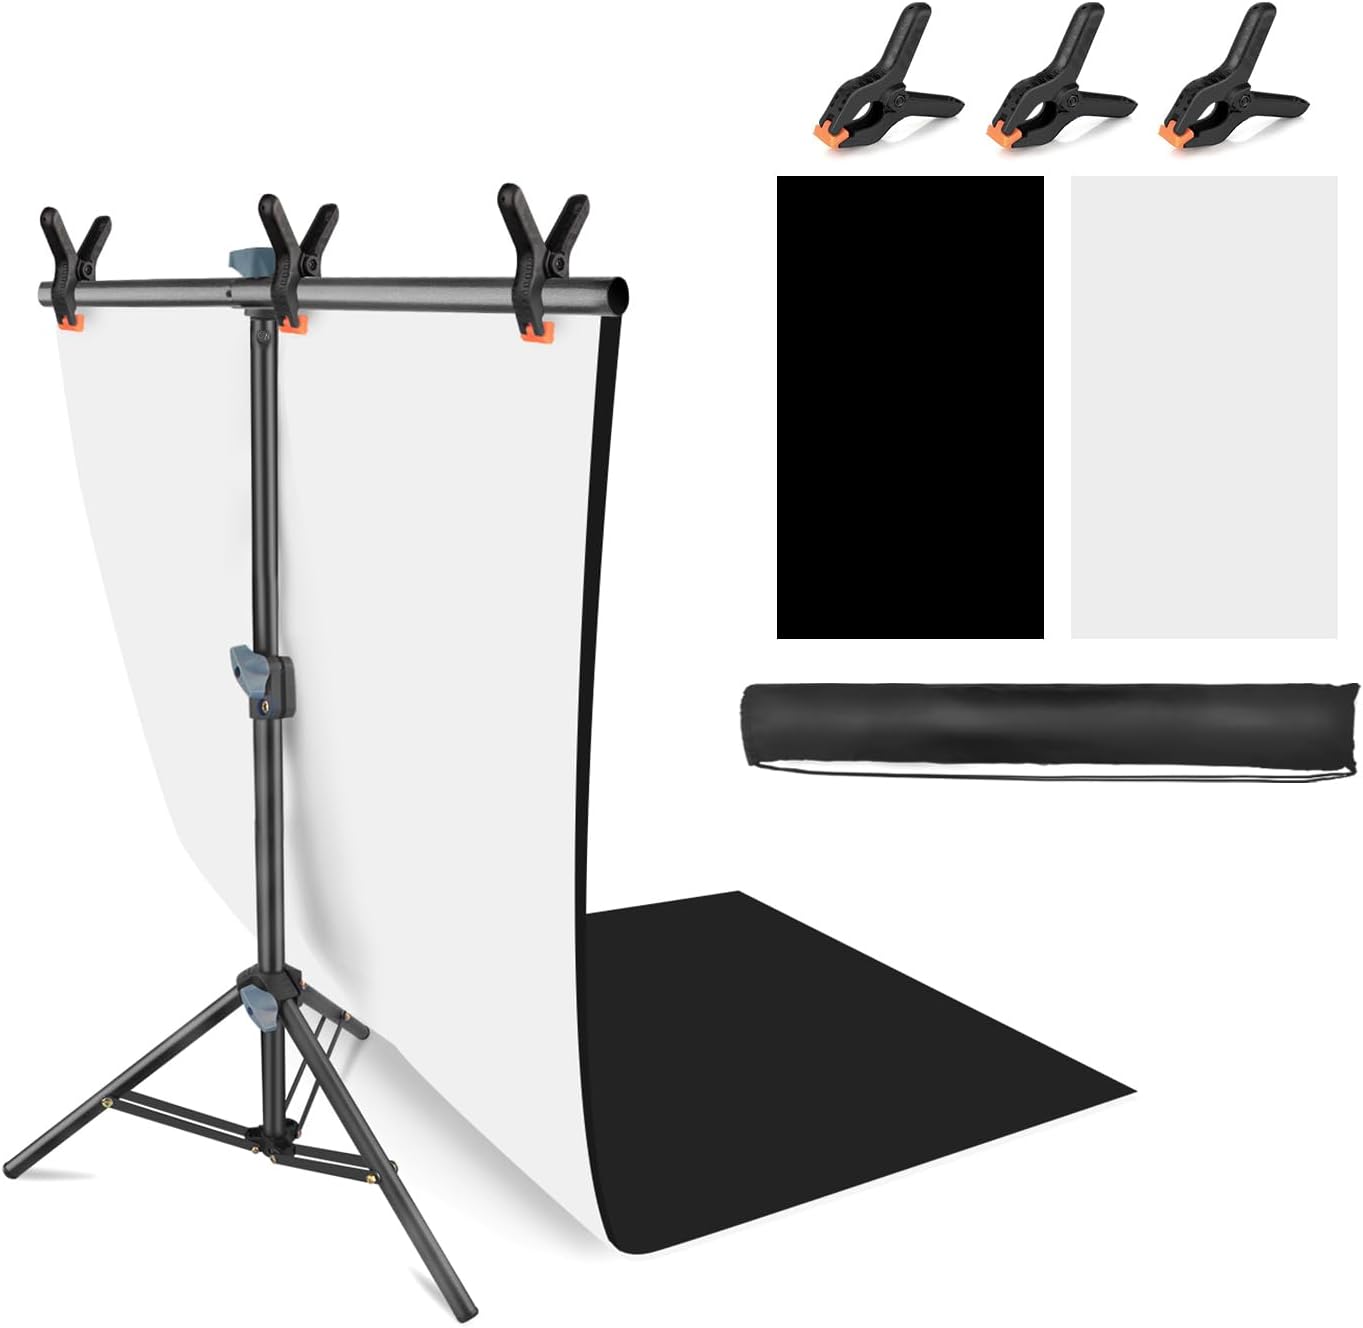
The selected JEBUTU package, ASIN B0CZ9NZ6DH, includes the small T-shaped stand, two crossbar pieces, white and black fabric backgrounds, three clips, and a bag for the stand. These are the contents recorded from the exact branded Amazon listing, not assumptions about every similarly named kit.
Its listing says the carrying bag holds the support rather than the fabric backgrounds, and notes that the folded cloth can arrive wrinkled. Plan a separate place for the fabric instead of assuming the entire shooting surface disappears into one small bag.
Consider this arrangement when you photograph small items on a table that can spare space for the stand’s base. If your usual subjects are earrings, a small candle, or a compact cosmetic bottle, think about how each would sit in front of the same support.
The important tradeoff is that the support becomes another object on your working surface. Before buying, mark a possible stand position on the table and check whether you can still move the product, place a reflector, and bring the camera to the angle you need.
The listing gives conflicting unit figures for its minimum stand height, so this comparison does not use that minimum to promise a particular fit. If your arrangement depends on a low crossbar position, confirm the exact measurement with the seller before choosing it.
Choose the JEBUTU format for a deliberately small scene, not because its compact label guarantees easier use in every room. If the support base displaces your subject or leaves no room for lighting, a small stand can make the table feel more crowded rather than less.
NEEWER 8.5-foot by 5-foot T support: for a background behind the table

The selected NEEWER kit, ASIN B0B2PN27VH, is a floor-standing alternative rather than a small stand you should place on the tabletop. Consider it when you want to reserve the table for the product and can give the background support its own area behind it.
NEEWER’s official specification page gives a 150-centimeter assembled crossbar and a stand-height range of 105 to 260 centimeters. Those figures describe the support, not the usable width or weight rating of every background you might attach.
The documented package includes one stand, two crossbar sections, six spring clamps, and a carrying bag; NEEWER explicitly excludes the backdrop and ball head. Budget and store your chosen background separately rather than treating the pictured support as a complete fabric kit.
The wider arrangement may help when your subject group extends beyond a small tabletop background, but it also changes the room plan. Mark the crossbar’s span behind the table and leave somewhere for the base and for your own movement.

On a small screen, scroll the diagram sideways to read its labels.
For example, imagine a reusable corner where you photograph several small containers together and want the table clear between views. A support behind the table can suit that routine if you can keep its legs out of the path you use to reach the products.
It is a less convincing choice when the only available floor area is a narrow passage or when packing away requires moving furniture every time. The extra background span earns its place only if you can use it without making the surrounding room awkward.
Compare the whole setup, not one number
Draw your tabletop as a rectangle and add the camera position, light, product, and proposed support. For the floor option, extend the drawing beyond the table so the base does not disappear from your plan simply because it is absent from the finished photograph.
Next, include the background material you actually want to use. A light fabric, a small sheet, and a bulky roll create different handling questions; a listing’s crossbar width alone cannot establish that an unsupported material or load is appropriate.
No hands-on loading or stability comparison was performed for this shortlist, and no shared payload figure is used to rank the two kits. Follow the selected manufacturer’s instructions and resolve any missing load or attachment information for your actual background before relying on it.
Treat a photograph of a tidy stand as a starting point for questions rather than proof of your complete arrangement. Check how the crossbar locks, how the material attaches, and whether reaching for the product would put your body against the support.
Make packing part of the choice
A useful pack-away setup has a home for every part, including clips, fabric, and the notes that help you rebuild it. Decide which pieces can remain together and which need protection from bending, creasing, or being left behind in a drawer.
For a shared dining table, rehearse the end of the session as well as the beginning. Imagine clearing the product, removing the background, collecting the clips, and returning the room to normal before deciding that one extra bag is inconsequential.
If you photograph only occasionally, a clear packing sequence may matter more than a slightly faster-looking assembly video. Keep the simplest arrangement that supports the photographs you need, rather than adding parts for subjects you do not currently shoot.
When neither support is the right purchase
Skip both shortlisted arrangements if the job depends on a heavy or oversized roll whose support requirements are not established by these selected kits. Look for a system documented for that exact task rather than interpreting a wider bar as a larger safe working load.
Neither option fixes a room where the only stand position blocks normal access, or a table that leaves no workable camera and lighting position. In that case, first change the shooting location or reduce the scene before buying a support to occupy the remaining gap.
You may also discover that the real problem is the background itself rather than its stand. A rigid surface that already suits your small subject, or a different arrangement of the material you own, could make a new freestanding support unnecessary.
Choose around your next session
Choose the small JEBUTU arrangement when you have a genuinely small scene and a workable place for its base on the table. Choose the NEEWER floor arrangement when a wider background and a clear tabletop justify reserving floor space behind it.
Before ordering, check the exact variant and included pieces against the two arrangements described here. Your best choice is the support you can position, attach, and put away with a clear plan, while leaving the product photograph itself easy to make.